
I’ve had softball bats that looked rough after a single season. The paint chips, the finish dulls, and the bat still swings just as well as the day I bought it, but it looks like it went through a war.
Some players don’t mind that beat-up look. Honestly, I kind of like it, it tells a story. But plenty of teammates I’ve coached want their bat looking sharp again, whether that means restoring the factory finish or going full custom with their own colors and a decal kit.
So can you paint a softball bat? Yes, and I’ve repainted a handful of my own bats over the years. But there’s a right way and a wrong way to go about it. Get sloppy, and you can ruin the bat or get it flagged at inspection before you ever step up to the plate.
Before I walk you through the actual steps, let’s clear up the question I get asked more than any other: does painting your bat mess with its certification?
Will Painting a Softball Bat Break Any Rules or Void Its Certification?
Short answer: a simple cosmetic repaint of a bat you already own, done the right way, is not the same thing as “doctoring” a bat, and it won’t get you banned by itself. What actually gets players in trouble is either altering the bat’s structure (shaving the barrel walls, adding weight to the end cap) or using paint and decals to disguise an uncertified or banned model as something it’s not. Those are two very different things, and I want to be clear about which one you’re actually doing before you pick up a spray can.
Here’s the part that trips people up. USSSA and USA Softball (the group formerly known as ASA) both require that a bat’s key graphic information, meaning the certification stamp, BPF number, serial number, model, and manufacturer name, stays permanent and legible for the life of the bat. USSSA’s own rulebook is blunt about it: those markings “must be permanent and cannot be applied as decals or by any other method that would allow the key graphics to be easily removed or added.” A bat that shows up to a game with worn-off graphics, or with paint covering that information, gets pulled from play until you fix it.
So the rule isn’t really about paint itself. It’s about keeping that information visible. If you repaint your bat and carefully mask off the certification stamp so it stays crisp and readable, you’re in the clear. If you paint straight over it, or bury it under a heavy decal, you risk having a perfectly legal bat rejected at inspection, even though nothing about how it actually performs has changed.
Where things get genuinely illegal is when someone uses paint to relabel a bat, dressing up a banned or never-certified model with a certification mark it never earned, or when the barrel itself has been physically altered (shaved walls, added end-load weight) to boost performance beyond its rating. That’s the behavior USSSA and USA Softball actually go after, and the penalties are steep, ranging from multi-year suspensions on a first offense to lifetime bans for repeat offenders. I’m not walking you through anything close to that here. This guide is strictly about giving a bat you own a legal, cosmetic refresh.
If you want the full rundown on what actually gets a bat pulled from a game, I broke it down in What Softball Bats Are Illegal?. And if you play across both USSSA and USA Softball leagues and want to see how their certification marks and standards stack up against each other, my USSSA vs ASA (USA Softball) softball bats guide covers that side by side.
One more practical note: don’t go overboard with the number of coats, especially on the barrel. A couple of thin, even coats add basically nothing to a bat’s dimensions. But piling on heavy layers of paint and clear coat can, in theory, nudge a barrel that’s already close to the legal diameter limit out of spec. Keep it thin, keep it even, and you won’t give an umpire anything to question.
What Kind of Paint Do You Use on a Softball Bat?
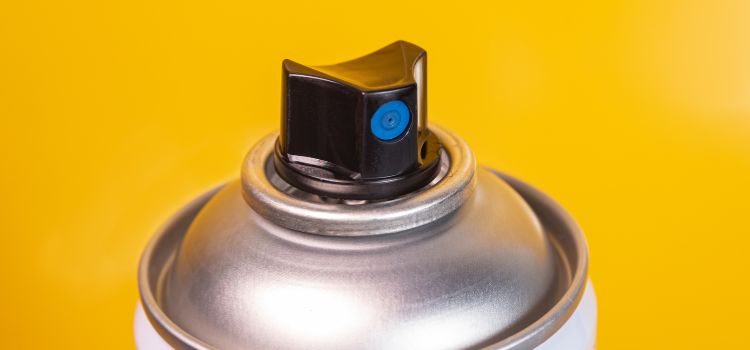
If you want to paint a softball bat, the type of paint you use matters more than almost anything else in this whole process. Skip the cheap, off-the-shelf craft paint. It flakes off fast and won’t hold up to the vibration and impact a bat takes every time you make contact.
Ideally, you want epoxy paint, since it adheres well to both metal and composite surfaces. I’ve also had good results with enamel and polyurethane paints. Whichever you go with, grab it in an aerosol format. It makes getting an even coat a lot easier, especially around the taper and handle.
One thing to flag if you’re working on a composite bat: skip harsh solvent-based strippers and thinners like acetone or lacquer thinner when you’re prepping the surface. Strong solvents can eat into a composite barrel’s resin layer and clear coat, which is the opposite of what you want. A light, even scuff with fine sandpaper and a wipe-down with mild soap and water is plenty.
How to Paint a Softball Bat?

Most softball players swing either an aluminum alloy bat or a composite one. Wood bats are still around, but most teams these days only reach for wood during practice. If you’re not sure what your own bat is made of, I walk through how to tell in my breakdown of what softball bats are made of.
For simplicity, I’ll cover the steps for painting an aluminum softball bat first. Painting a wood bat follows the same steps, except you’ll want a wood-specific primer. And if you have a composite bat, don’t worry, I’ll cover what’s different for those in a bit.
Step 1: Plan Out Your Project
The first step is to plan the project and sketch your idea out on paper. It’s tempting to skip this, thinking you’ve already got a clear picture in your head. But once you actually sketch it out, you’ll see the finished project a lot more clearly.
That way, you can switch up colors before you’re committed if the original combination doesn’t look as good on paper as it did in your head. So whenever you’re planning to paint your softball bat, sketch it out and keep it in front of you while you work.
Step 2: Choose Your Paint
Choosing the right paint is almost half the battle when you’re giving your softball bat a new look. As I mentioned above, aerosol-style epoxy, enamel, or polyurethane paints work best for this kind of project. Make sure the quality is good and that it won’t chip or peel over time.
Step 3: Choose Your Decals
If it’s a simple paint job and you don’t want decals, feel free to skip this step. I usually go with a custom decal on my own bats since it makes the finished product look even better. Just make sure you’re not covering the manufacturer’s certification mark or key graphics while applying it. That mark needs to stay visible for the bat to pass inspection.
Step 4: Prepare the Bat
With everything planned out, start prepping the surface of the alloy or wood bat. Take soft grit sandpaper, somewhere in the 200 to 220 grit range, and lightly sand the old paint off. Don’t rub too hard or you’ll damage the material underneath. A gentle pass is usually enough to get rid of most of the old finish. If you’re having trouble, switch to a coarser grit to make it easier.
During this step, use masking tape to block off any surface you’re not painting. That includes the handle grip and, just as important, the certification stamp and any serial numbers or model markings. Cover those completely with tape so they come through the process untouched.
Step 5: Prime the Surface
Use a high-quality primer to prep the surface for painting. The right primer depends on whether the bat is wood or aluminum. For aluminum bats, use a primer that’s specifically designed for metal.
Once the primer’s on, lightly sand it with very fine-grit sandpaper. This knocks down any runs or drips and leaves a smooth surface for the paint to grab onto. Wipe away any dust with a clean rag before you move on.
Step 6: Apply the Paint
Grab your can of spray paint and start working the surface of the bat. The trick is keeping the spray moving and never resting on one spot too long. Hold the can at least 10 inches from the surface so the paint doesn’t drip or run.
For the best results, apply several thin coats around the bat rather than one heavy one. Thin, even coats look better, dry faster, and are far less likely to run than trying to get full coverage in one pass.
Step 7: Let It Dry
Some paints dry within a couple of hours, while others take a couple of days. Leave the bat in a well-ventilated room and let it dry for as long as the label recommends. Once it’s fully cured, peel off the masking tape and your softball bat should look brand new, certification stamp included.
Can You Paint a Composite Bat?
Yes, you can paint a composite bat, and the steps are similar to an aluminum bat, though it usually takes a few extra coats to get full coverage. Personally, I don’t repaint these as often since most high-end composite softball bats already look great right out of the box.
Just remember what I covered earlier: keep the paint job light and even, avoid harsh solvents when you’re prepping the composite surface, and never cover the certification mark or model information, no matter how good the color combination looks over it.
How to Paint a Composite Softball Bat
If you still want to give your composite softball bat a new paint job, follow the same steps as painting a wood or aluminum bat. Since the process is nearly identical, I won’t repeat the whole rundown. Instead, here’s where composite bats differ slightly.
When prepping the bat and sanding it down, I use a finer 400 grit sandpaper instead of the coarser grit I’d use on aluminum. A lower grit barely touches the factory finish on a composite barrel, so you need something finer to scuff it just enough for the primer to bite without gouging the resin underneath.
Can You Spray Paint a Softball Bat?
Yes, you can spray paint a softball bat, and it won’t affect the bat’s performance as long as you don’t change the underlying material, weight, diameter, or wall thickness. A cosmetic coat of paint doesn’t touch the trampoline effect or barrel flex that actually determines how a bat performs.
That said, be careful when you’re spray painting. Read the instructions on the can, work in a ventilated space, and mask off the certification stamp before you start, for the reasons I covered above. Get those basics right and you’re good to go.
My Favorite Paint Products to Use on a Softball Bat
Now that you know the steps to paint a softball bat, here are a few paint and primer products that have served me well over the years.
1. Krylon K02725007 Fusion All-In-One Spray Paint for Indoor/Outdoor Use

When I first used Krylon’s Fusion spray paint, I became a fan pretty quickly. It works fast, dries fast, and once the job’s done, the color comes out noticeably vibrant. A 12-ounce can gets you through a full bat with plenty left over, and it dries to the touch in about 20 minutes.
This spray paint works on a wide range of surfaces, including plastic, wood, metal, and PVC, so getting it to stick to a softball bat barrel isn’t difficult regardless of the material. Just prep the surface properly and apply your coats.
I usually go with an epoxy base and add a flex additive as a catalyst to keep the paint from getting brittle. When I’m painting a composite bat specifically, I spray a black base coat first, set up the decal kit, then apply three coats over the top.
Composite bats flex more than alloy or wood, so without a flex additive, the paint can crack after a few swings. Add that flexibility to the mix and it adheres well and stays put through a season of use.
2. Zinsser 272479 ZINSSER-02008-1/PACK Bulls Eye 1-2-3 Plus Primer Spray

Zinsser’s Bulls Eye is another solid pickup if you want to change up your softball bat’s look. Like the Fusion, it works across a wide range of materials, including wood and metal, so it should adhere fine to your bat’s surface.
The formula is oil-based, which helps it rest evenly on the surface instead of running. Since primer is already mixed in, you don’t need a separate primer coat before you use it.
It also has decent stain resistance, so once it dries, it helps keep dirt from building up on the barrel. Dry time runs around 30 minutes, so you won’t be sidelined for long.
3. USC 2K Spray Max Epoxy Primer Paint Aerosol

This last one isn’t suitable for wood or composite bats, but if you have an aluminum alloy softball bat, the 2K Spray Max Epoxy paint by USC is a fantastic pickup. The only downside is the price, which runs a bit steep.
Still, the quality holds up, so if you can afford it, you won’t be disappointed. Primer is already built into the formula, so you don’t need to buy a separate can.
You get around 14.1 ounces of paint per can, and the nozzle delivers it with better precision than most aerosol cans. If you go this route, I’d recommend two or three even coats on the bat for the best results.
The Bottom Line
Painting your softball bat can be a fun project if you’ve got the right tools and a bit of patience. The most common mistake I see is people grabbing the wrong paint. Synthetic or emulsion paints don’t adhere well to softball bats, so stick to enamel, polyurethane, or epoxy if you want the job to last.
The second most common mistake is covering up the certification stamp without meaning to. Mask it off, keep your coats thin, and don’t touch the barrel’s actual structure, and a repaint stays exactly what it should be: a cosmetic refresh, not a legality problem.
I know figuring out the steps on your own for the first time can be a little tricky. But if you follow my instructions here, you should be able to fully customize the look of your softball bat without putting its legality at risk. Good luck!

With 4 years of Division II experience, a .272 career batting average, .410 on-base percentage, and 7 home runs, I’m now in my fifth season. I’ve played baseball since age 3, alongside future MLB Draft picks, and I aim to pursue a career in baseball professionally, be it playing, coaching, or scouting.