
Just as a field general leads an army to battle, it is the duty of the catcher to lead his team to victory. A catcher has the critical job of setting up defense strategies that eventually lead to their opponent’s downfall.
On most teams, if not every team out there, the catcher is usually the team leader.
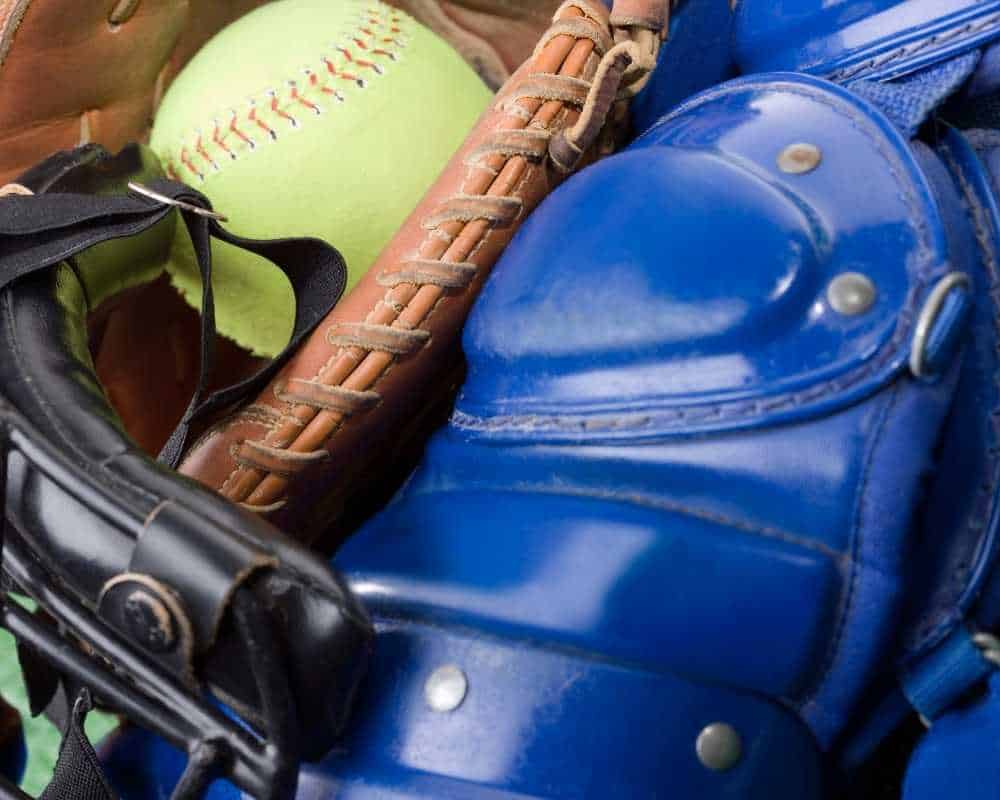
Typically, a player only has to carry a glove and a uniform to the field. But the story is different for a catcher. A complete catcher’s gear setup includes a chest protector, a helmet, a catcher’s mitt, shin guards, and a bag to haul it all in. If you’re still shopping and want to know what’s actually worth buying, I broke it all down in my guide to the best catchers gear.
Though I enjoyed my time as a catcher, I absolutely despised cleanup days. It took me hours to clean every piece of equipment I had to carry. Well, all my effort (and regret after cleaning) vanished the moment I walked off the diamond with the taste of victory.
So, I knew it was essential to keep my gear in peak condition for my performance. Otherwise, one little smell might disrupt my focus (maybe it wouldn’t, but I was never the one to take that risk).
If you play as a catcher, you must also care for your equipment. Unless it’s cleaned regularly, catcher’s gear can start to smell and break down faster than it should.
Fret not, though, because I’m here to make things easier for you. I’ve picked up plenty of tricks over the years to make cleanup go faster and smoother. So let’s get into exactly how to clean catcher’s gear, piece by piece.
How Do You Clean a Catcher’s Helmet?
The catcher’s helmet typically doesn’t get too dirty. But it does start to smell if you don’t clean out the inside every now and then.
I always recommend keeping some sports-safe antibacterial wipes in your bag. You can wipe down the inside of your helmet after each game to keep any foul smell from setting in. Just skip anything with bleach in it. Bleach can eat through the foam padding and dull the paint on the shell over time.
But wipes alone aren’t a permanent solution. Ideally, you want to clean your helmet thoroughly at least once a week. Thankfully, cleaning your top-shelf catcher’s helmet isn’t all that difficult or frustrating.
- Start by removing the straps from the helmet. Take a moist cloth and wipe both the outside and inside. You can use a bit of mild soap if the helmet feels especially dirty. Make sure to rub the metal cage thoroughly, since that’s the part that gets grimiest.
- Once you’re done wiping it down, spray a bit of disinfectant inside the helmet and let it air dry. Look for a disinfectant spray labeled safe for sports equipment rather than a generic household cleaner, since some household formulas can be too harsh on foam padding. It should be ready to use after a couple of hours.
How Do You Wash a Chest Protector?
As you may already know, chest protectors have two sections: the outer plastic layer and the inner layer of fabric.
These two sections trap moisture and give you extra protection while playing. Cleaning your chest protector properly means cleaning both layers individually.
- The first step is to take the two layers apart by removing all the straps and shoulder pads. Then you can toss the fabric layer inside the washing machine on a cold, gentle cycle to make things easier on your part. Shake it out well to remove any loose dirt first, and drop it into a mesh laundry bag before it goes in. That keeps the straps from tangling around the drum and stops the padding from getting stretched out of shape.
- Cleaning the plastic layer requires a more hands-on approach. Start by knocking off any loose dirt by shaking the protector. Then, similar to how you cleaned the helmet, take a wet towel and wipe it down thoroughly. You can use soap, but in my experience, plain water works just fine.
- After that, sanitize the layer with a disinfectant spray. Spray generous amounts both inside and outside the protector. Once you’re done, leave it out to dry. I typically leave my gear out in a well-ventilated room for around 24 hours.
How Do You Clean and Condition a Catcher’s Mitt?
The catcher’s mitt is the most critical piece of gear a catcher owns. When it comes to cleaning it, you need to pay special attention.
No matter how sturdy it feels, resist the urge to throw the mitt in the washing machine and call it done. Handwashing is the only way to go. You also need to condition it from time to time.
- First, take a dry cloth and wipe down the mitt thoroughly. It’s natural for the mitt to be dirtier than your other gear, so take your time. To make things easier, dampen the cloth in a bit of soapy water. Once you’re happy with how the glove looks, wipe away the excess soap and let it air dry.
- Once it’s dry, take a bit of leather conditioner oil and apply it to the glove. This oil keeps the leather smooth and helps prevent cracking. Even if you have the best catchers mitt out there, the leather will start to crack if it isn’t conditioned properly. So this step is absolutely vital.
- I always recommend going with a high-quality oil like the Lanolin Baseball Glove Oil. It costs a bit more, but I love the performance it delivers.
- If the inside of your glove feels dirty or smells off, apply a light coat of disinfectant spray. Just don’t let water get inside the glove, since it will take ages to dry fully and can leave the padding musty.
How Do You Clean Shin Guards?
Cleaning shin guards isn’t nearly as involved as cleaning the rest of your catcher’s equipment.
- Undo the straps and knock off any loose dust or dirt on the shin guards. Then spray the guards with disinfectant from all sides. Leave them out to dry for a couple of hours, and they’re good to go.
- The main thing to remember is to use a disinfectant that’s approved for use on sporting goods. Antibacterial wipes work too if you’re short on time.
- If you run knee savers between your shin guards and knees, give those a wipe-down as well. I actually wrote a whole piece on whether knee savers are bad for catchers, which is worth a read if you’re still deciding whether to add a pair to your gear bag.
How to Wash a Catcher’s Bag?
Since a catcher needs so much gear, it’s often worth it to invest in a good catcher’s bag. But if you already have one, it needs some attention and care too.
- Even though the bag stays in your locker between games, it can get smelly fast since it carries all your dirty gear after every practice. Cleaning it can be a bit of a hassle, but it’s worth doing from time to time.
- Start by emptying the bag and removing any supportive cardboard inserts. If possible, turn the bag inside out, since that gives you easier access to the dirtiest sections.
- Handwashing the bag is really the only proper way to clean it. Stick to water and soap, and avoid harsh chemical solutions.
- Personally, I go with a scented soap since the smell afterward is fantastic. After cleaning the interior, rinse it off thoroughly with water.
- Leave it in a well-ventilated area to dry. Depending on the quality of the bag, it can take a couple of hours to dry fully.
- I prefer leaving mine overnight just to be safe.
How Do You Keep Catcher’s Gear from Smelling?
Catcher’s gear can get smelly fast. While playing baseball, it’s natural to sweat, and once that sweat dries in your gear, it starts giving off a foul smell. The good news is you don’t have to thoroughly wash your gear after every single game just to keep it from smelling.
Keep a deodorizer spray in your catcher’s bag that you can lightly spray over your gear to knock out the smell. You can also use scented sanitizing wipes to gently wipe down the surface of your equipment. I prefer the latter method since it disinfects the gear a bit at the same time.
One cheap trick I picked up along the way: toss an open box of baking soda inside your bag between games. It soaks up moisture and helps cut down on the funk without any spraying at all.
Can You Wash Catcher’s Gear in a Washing Machine?
The only piece of catcher’s equipment that’s generally safe to run through the washing machine is the fabric layer of your chest protector, and even then, on a cold, gentle cycle. Everything else should be washed by hand only. I’ve already walked you through the proper cleaning method for each piece above.
When washing the fabric layer in a machine, check the manufacturer’s instructions first. It should tell you which settings to use. Keep in mind that some manufacturers recommend handwashing the fabric part too, using soap and warm water.
So before you toss your protector into the washing machine, read the instructions to make sure you’re actually in compliance.
How Do You Get Smell Out of Catcher’s Gear?
If all your attempts to keep your catcher’s gear from smelling fail, there’s no reason to give up. You can get rid of the smell by doing a thorough, individual cleaning of each piece. And while it dries, make sure to let it air dry only.
Forcing your gear to dry faster with heat or other shortcuts can lead to mold and mildew that are extremely difficult to remove. It can also make your gear even stinkier in the long run. So you really have to stay on top of it, because once the smell gets too strong, it’s a tough one to get rid of.
A Few Final Words of Wisdom
Keeping your gear in peak condition is essential to giving your best performance as a catcher. The last thing you want is to fight bad smells from your helmet while also trying to play against the opposing team. You can excel at one, but not both at the same time.
If you’re planning to go big in this game, you need to treat your equipment with respect. Keeping your gear clean should be treated like a solemn duty.
Though I never exactly looked forward to cleaning my gear every week, looking back, I think of it as something that helped me appreciate the game more. Your gear becomes an extension of you and a reflection of your playing style.
Yes, I understand that cleaning all your gear can seem annoying and sometimes downright frustrating. But it’s your duty and part of the role all the same. For what it’s worth, I hope my tips make this chore a bit more bearable for you.
I gave you the easiest ways to go about cleaning your catcher’s gear. So if you give it some time, cleaning your gear will become second nature.
I hope you got everything you needed to know about how to clean catcher’s gear. Now get your equipment ready for the next big match, because time’s ticking. Cheers!

With 4 years of Division II experience, a .272 career batting average, .410 on-base percentage, and 7 home runs, I’m now in my fifth season. I’ve played baseball since age 3, alongside future MLB Draft picks, and I aim to pursue a career in baseball professionally, be it playing, coaching, or scouting.