
I get asked this constantly: what’s the fastest way to break in a glove? Whether you’re reviving an old glove or just unboxed a stiff new one two days before your first game, waiting weeks isn’t always an option.
Here’s the honest answer: there’s no trick that turns a stiff piece of leather into a game-ready glove in an hour. But there are real, tested methods that can get you playable in a day or two instead of the two to four weeks it takes to break in a glove just by playing catch. I’ve used every method below on my own gloves, so I’m going to walk you through what actually works, what to skip, and why the oven trick you’ve probably heard about is a bad idea.
What You’ll Need
Before you start, gather these:
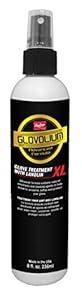
- A dedicated glove oil to soften new leather fast (I use Rawlings Glovolium XL – it’s cheap, sprays on evenly, and won’t darken the leather)
- A wooden or rubber glove mallet for shaping the pocket faster (no fist or ball substitute works quite as well)
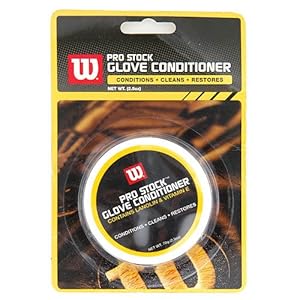
- A glove conditioner for the finishing touch (Wilson Pro Stock Glove Conditioner is a solid pick, especially if the glove’s been sitting unused)
- A baseball and a couple of rubber bands or an old shoelace
- A regular table fan (skip anything that generates heat – more on that below)
- A couple of clean, soft cloths
The Fastest Ways to Break In a Glove That Actually Work
These four methods are what I’d actually recommend if you need a glove ready quickly. Used together, they’ll get you further in a day or two than most gloves get in weeks of casual catch.
1. The Wrap-and-Tie Method
This is the single best trick for shaping the pocket fast, and it’s basically risk-free. Place a baseball right where you want your pocket to form, close the glove around it, and wrap it tight with rubber bands or lace it shut with a shoelace. Leave it tied up for at least 24 to 48 hours.
The constant pressure forces the leather to hold the ball’s shape, which speeds up pocket formation more than almost anything else on this list. It’s the same core idea I cover in more detail in my full glove break-in guide, just condensed for speed.
2. The Glove Mallet Method
A mallet does in twenty minutes what dozens of catches would take days to accomplish. Start at the pocket and work outward, using firm but controlled strikes, not full-force swings. Pay attention to the “break points” where the thumb and pinky meet the palm since those are the areas that determine how easily the glove opens and closes.
I like combining this with the wrap-and-tie method: mallet the glove first, tie a ball into the pocket, then mallet it again once it comes out. That one-two combo is what I’d call the actual fastest way to break in a glove without risking the leather.
3. The Shaving Cream Shortcut
This one surprises people, but a lanolin-based shaving cream works almost identically to a glove oil since lanolin is the same softening ingredient in most dedicated conditioners. Rub a small amount into the leather, let it sit overnight, then wipe it down and shape the glove as usual.
I’ve written a full walkthrough on how to break in a baseball glove with shaving cream, including exactly which formulas to avoid, since a lot of modern aerosol foams will dry the leather out instead of softening it.
4. The Warm Water Method
Pour warm, not boiling, water into the pocket of the glove. This relaxes the fibers enough to let you squeeze, twist, and stretch the leather by hand, which is a technique glove craftsmen actually use. Work the heel pad by squeezing it back and forth, then pull the fingertips and web outward to stretch them.
Once you’ve shaped it while damp, mallet the pocket, then let it air dry completely before you play with it. This method works fast, but go easy on the water. Soaking the glove instead of lightly dampening it is where people run into trouble.
What About the Oven or Microwave Method?
You’ve probably seen this one floating around: wrap the glove, toss it in a warm oven or microwave for a few minutes, and it comes out soft. I’m not going to recommend it, and honestly, most people who’ve actually tested it don’t either anymore.
Applying dry, artificial heat to leather dries it out at the fiber level. It might feel soft the moment it comes out, but that softness comes at the cost of the leather cracking and breaking down months down the road. I go through exactly why in my glove-in-the-oven breakdown, but the short version is this: it’s not worth the risk for a glove you probably just spent real money on. Skip the heat, and use the methods above instead. They’re nearly as fast without gambling on your glove’s lifespan.
The same goes for leaving your glove on a car dashboard or under direct sun to “speed up drying.” It causes the same kind of damage, just slower.
My Same-Day Fast Break-In Routine
If I had to get a glove as game-ready as possible in one sitting, here’s the order I’d actually do it in:
- Play some catch first, even just 15–20 minutes, so you can feel how stiff the leather actually is.
- Apply a light coat of glove oil to a cloth (never straight onto the glove) and work it into the leather, focusing on the pocket and hinge points.
- Hand-mold the glove around your fist to start shaping the fingers and pocket.
- Mallet the pocket and break points.
- Tie a baseball into the pocket and leave it wrapped overnight, or up to 48 hours if you have the time.
- Untie it, apply a light coat of glove conditioner, and let it air dry under a fan in a cool, dry spot. Never a heater, oven, or direct sun.
- Play catch with it again once dry. Repeat steps 2 through 6 if it’s still stiff in spots.
Realistically, this gets most gloves comfortable enough to use within a day or two. A truly fully broken-in glove, one that molds perfectly to your hand and holds its pocket without thinking about it, still takes one to two weeks of regular use on top of this. Anyone promising a full break-in in a few hours is oversimplifying it.
Position Makes a Difference
How you shape the pocket while doing any of this depends on where you play. Outfielders generally want a slightly deeper pocket to help track fly balls, so close the glove more toward the pinky side. Infielders usually want a shallower pocket for quicker transfers, so focus your shaping more toward the palm. Only you know exactly how the glove fits your hand, so use these as a starting point, not a hard rule.
How Long Should You Really Expect This to Take?
It depends almost entirely on the leather. Softer, budget-friendly leather and synthetic gloves can feel playable within a day or two using the methods above. Premium steerhide or kip leather gloves are thicker and more durable, but they also fight you longer, even with a mallet and oil in the mix. I cover the leather-by-leather breakdown in my main break-in guide if you want the specifics for your glove’s material.
Catcher’s Mitts and Softball Gloves Need a Slightly Different Approach
Everything above is written with a standard infield or outfield glove in mind. If you’re working with a catcher’s mitt, the padding is thicker and the break-in priorities are different since you’re shaping a mitt for absorbing impact, not closing around a ball. I’ve got a dedicated guide on breaking in a catcher’s mitt that walks through that.
Same goes for fastpitch softball gloves, which tend to run stiffer than baseball gloves out of the box. My fastpitch softball glove break-in guide covers the same fast methods with a few position-specific tweaks.
Conclusion
Take a look at this video tutorial if you get stuck at any point.
There’s no magic button for a broken-in glove, but the wrap-and-tie method, a mallet, and the right oil will get you playing sooner than just waiting it out ever will. Skip the oven, be patient with the wrap step, and your glove will thank you for seasons to come. Good luck out there!

With 4 years of Division II experience, a .272 career batting average, .410 on-base percentage, and 7 home runs, I’m now in my fifth season. I’ve played baseball since age 3, alongside future MLB Draft picks, and I aim to pursue a career in baseball professionally, be it playing, coaching, or scouting.